Mastering the Forward Stroke: How to Paddle Your Kayak Like a Pro (2026)
Introduction
If you’ve ever paddled a kayak and felt like you were working twice as hard as the person next to you — yet still drifting off course — you’re not alone. The forward stroke seems simple on the surface. You dip the paddle in, pull it back, and move forward. But here’s what most beginners discover: the difference between paddling that actually moves you efficiently and paddling that just splashes water comes down to technique.
The good news is that the forward stroke is a learnable skill. The even better news is that you don’t need elite athleticism or years of practice to see dramatic improvement. You need the right information, a few key corrections, and the willingness to practice intentionally.
Here’s what you need to know: the forward stroke is the foundation of all kayak movement. Everything else you learn — turning, bracing, navigating currents — builds on this one technique. And when you master it, you’ll paddle longer with less fatigue, stay straighter with less effort, and actually enjoy your time on the water instead of wondering why your arms hurt.
In this guide, we’ll break down the biomechanics of an efficient forward stroke, walk through each of the five phases in detail, identify the most common mistakes (and how to fix them), and give you five drills you can practice during your next paddling session.
What Is the Forward Stroke — and Why Does It Matter?
The forward stroke is the primary paddling technique you use to move a kayak in a straight line forward. Unlike specialty strokes designed for turning or bracing, the forward stroke is what you’ll rely on approximately 80–90% of the time you’re on the water.
Understanding its mechanics isn’t just about going faster. It’s about going further with less effort, staying injury-free, and actually enjoying your time on the water.
The Foundation of All Kayak Movement
Every advanced kayaking technique builds on the forward stroke. The draw stroke, sweep stroke, and bracing techniques all require the same core mechanics: proper body rotation, blade control, and power generation from the large muscle groups. If you’re just getting started, our what you should know before your first kayaking trip provides essential background on getting started safely.
When you master the forward stroke, these other strokes become natural extensions rather than entirely new skills to learn. You’re not starting from scratch each time. You’re adapting a movement pattern you already understand.
Efficiency vs. Power: Finding the Balance
Many beginning paddlers assume that faster, harder strokes equal faster kayaking. In reality, efficiency — doing more with less — produces better results.
A powerful but inefficient stroke wastes energy, creates unnecessary splash, and leads to rapid fatigue. An efficient stroke uses the body’s largest muscles to generate continuous forward momentum with minimal wasted motion.
Think of it like the difference between sprinting and distance running. The sprinter uses explosive power for a short burst. The distance runner conserves energy through a sustainable rhythm. Most recreational paddling is distance running, not sprinting. You want efficient, not powerful.
How a Poor Forward Stroke Leads to Fatigue and Injury
When you rely on your arms to power each stroke, you’re using the smallest, least fatigue-resistant muscles in the upper body. This approach causes wrist pain, forearm strain, and shoulder injuries over time. For more on staying safe on the water, review our essential kayak safety checklist.
Poor body mechanics also mean your kayak zigzags instead of traveling straight, requiring constant correction strokes that add unnecessary work. You’re essentially paddling twice the distance you need to cover.
By contrast, proper forward stroke technique distributes the workload across your core, back, and legs — muscles designed for sustained effort. This approach keeps you comfortable and injury-free throughout your paddling journey.
Body Mechanics & Positioning: Before You Take a Single Stroke
Technique starts before the paddle even touches water. Your body position in the kayak sets the stage for everything that follows.
Your Seat Position and Core Engagement
Your seat should be adjusted so your hips sit slightly higher than your knees. This angle allows your spine to maintain a natural S-curve and gives you access to your core muscles.
Before each paddling session, take a moment to sit up straight. Roll your shoulders back and down. Imagine a string attached to the crown of your head, gently pulling you toward the sky. This isn’t about looking alert — it’s about creating the spinal alignment your core needs to work efficiently.
Your core (the muscles around your trunk, including your abs, obliques, and lower back) is your primary power source. But these muscles can only engage when your spine is in position. Slouching cuts off your power almost immediately.
The Power Zone: Using Your Torso, Not Just Your Arms
Your arms are levers, not engines. They transfer power from your core to the paddle blade, but they shouldn’t be the ones generating that power.
The large muscle groups in your torso — your lats, obliques, and core — can produce far more force than your biceps or forearm muscles. And they can sustain that effort for hours instead of minutes.
Here’s a practical way to feel the difference. Sit in your kayak without a paddle. Rotate your torso to the right as far as you comfortably can. Now rotate to the left as far as you comfortably can. Notice how much rotation you have without using your arms at all?
That’s your power zone. Your forward stroke should rotate your torso roughly 45 degrees to each side — from straight ahead to about 45 degrees past center. If you’re not rotating, you’re leaving power on the table.
Blade Height and Entry Angle Fundamentals
When holding your paddle across your kayak, the blades should sit roughly at chest height. This position lets you engage your core while maintaining a clean entry angle into the water.
The ideal blade entry angle is approximately 45–60 degrees relative to the water surface. This isn’t a precise measurement — think of it as “slicing in” rather than “plopping down.” A clean entry creates minimal splash, which means you’re displacing water efficiently rather than fighting turbulence.
Grip Width: Finding Your Ideal Paddling Position
Your grip width — the distance between your hands on the paddle shaft — affects both your power and your comfort.
As a starting point, position your hands slightly wider than shoulder-width apart. This distance lets your elbows bend at roughly 90 degrees when the paddle is at vertical.
Grip too wide, and you lose leverage and strain your shoulders. Grip too narrow, and your paddle becomes inefficiently short, forcing you to lean too far forward.
Everyone’s ideal grip width differs slightly based on shoulder mobility and torso dimensions. Use the shoulder-width starting point, then adjust in small increments until the position feels natural.
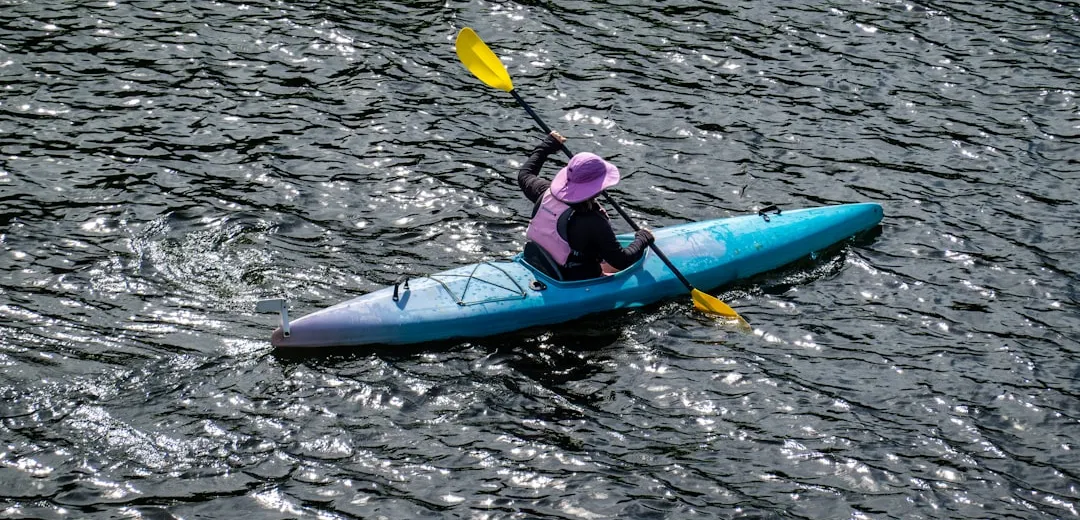
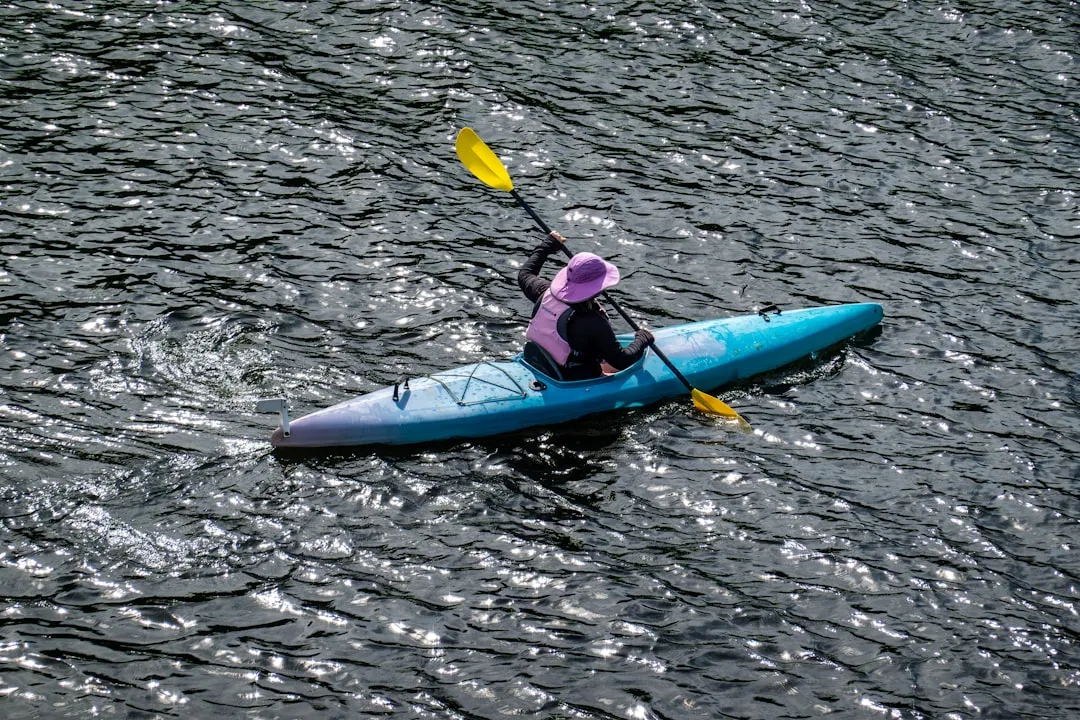
The 5 Phases of a Perfect Forward Stroke
The forward stroke isn’t a single motion. It’s a cycle of five distinct phases, each with its own purpose and technique. Understanding each phase helps you identify where your stroke might be breaking down. For a deeper dive into paddle selection that affects how these phases feel, check out our complete guide to kayak paddles.
Phase 1: The Setup — Blade Position and Body Rotation
The stroke cycle begins before your blade enters the water. Your top hand reaches forward — not way out in front of you, but comfortably ahead of your shoulder. Your torso rotates toward that side.
Your lower hand sets the anchor point. It should be positioned near your hip, slightly inside the gunwale (the edge of your kayak). Your elbow should be relaxed, with a slight bend.
The blade should be angled slightly forward, ready to slice into the water. Many paddlers make the mistake of holding the blade perpendicular at this point, which creates a chaotic entry. The slight forward angle sets you up for a clean catch.
Phase 2: The Catch — Clean Entry Without Splash
The catch is blade entry. This is where your paddle meets the water, and a clean catch is essential for efficient paddling.
As you rotate forward and your top hand extends ahead, plant the blade in the water near your toes. Enter at your chosen angle — roughly 45–60 degrees relative to the surface — with a smooth, slicing motion.
Think of it like cutting through butter with a sharp knife. A clean entry makes almost no splash. A poor entry creates a big splash and pushes water outward instead of pulling you forward.
If you’re creating a large splash on entry, you might be dropping the blade too vertically, entering too early or late in your rotation, or using your arm to force entry instead of letting your body motion set the timing.
Phase 3: The Power Phase — Engagement Through the Core
Once your blade is planted, the power phase begins. This is where the actual propulsion happens.
Your top hand drives forward, roughly parallel to the water surface. Simultaneously, your torso rotates away from the paddling side. Your lower arm acts as a stabilizer, controlling the angle of the blade throughout the phase.
The power comes from your core — the rotation of your torso drives the stroke. Your arm simply transfers that power to the paddle.
Keep the paddle shaft roughly perpendicular to the direction of travel through most of the power phase. If the shaft angles forward excessively, you’re pushing water toward the back of the boat rather than pulling the boat through the water. If it angles backward, you lose power to water displacement.
The blade should stay vertical throughout the power phase. Letting it wing out (angle toward the side of your kayak) wastes energy pushing water sideways instead of backward.
Phase 4: The Exit — Clean Release at the Hip
The exit is the moment your blade leaves the water. Timing the exit properly prevents wasted motion and keeps your momentum going.
Exit at the hip. As your torso reaches the end of its rotation, and your top hand passes the level of your shoulder, the blade has done its job. Continuing to pull further just splashes water behind you without adding forward propulsion.
The blade should exit cleanly, lifted rather than dragged. Lift your lower hand slightly — just enough to break the water’s surface — and let the blade clear before beginning the recovery phase.
Phase 5: The Recovery — Reset for the Next Stroke
The recovery phase is often the most neglected, but it’s critical for a smooth, efficient stroke cycle.
After exiting, the blade travels through the air back to the setup position. Your torso rotates back to center. Your top hand returns to its starting point near your chest.
The recovery is not a dead zone. It sets up your next catch. A sloppy, rushed recovery means a sloppy, rushed setup, which compromises your next catch.
A common cue for the recovery is to have your top hand travel in a relatively straight line back toward your body. Imagine a line running from your top hand’s finish position back to its starting point — that’s the path it should follow, not an arc.
Common Forward Stroke Mistakes (And How to Fix Them)
Understanding the phases is one thing. Recognizing where your stroke goes wrong is another. Here are the five mistakes we see most often — and how to fix each one. Many of these issues stem from habits formed when learning to paddle. For more foundational guidance on proper kayak stroke form, explore our detailed guide.
Mistake #1: Paddling with Your Arms Only
The Problem: Using your arms as the primary engine. This approach fatigues quickly and produces very little power. Your arm muscles are designed for fine motor control, not sustained heavy work.
The Fix: Shift your mental focus from “pulling with my arms” to “rotating my torso.” Think of your arms as connecting rods between your core and the paddle — the power originates in your torso, and your arms simply transmit it.
A simple cue: imagine your paddle blade is planted at the water’s surface, and you’re trying to rotate your belly button toward the opposite side of the kayak. Your arms follow naturally.
Mistake #2: Over-Reaching and Losing Core Connection
The Problem: Extending your top hand too far forward before catching. This position breaks your core connection and often leads to an awkward catch angle.
The Fix: Keep your top hand within the range between your shoulder and your nose throughout the stroke cycle. If your top hand goes past your nose, you’ve over-reached.
The temptation is to reach farther for more power. But over-reaching actually produces less power by disconnecting you from your core.
Mistake #3: Planting the Blade Too Deep
The Problem: Sinking the blade deep into the water. This creates more drag, makes the exit difficult, and provides no additional propulsion.
The Fix: For most paddling, the blade should work in the top 6–8 inches of water. This is where water moves most freely, and it’s where efficient propulsion happens.
Think of it this way: you want to move a large column of water a small distance, not a small column of water a large distance. Deep planting does the latter.
Mistake #4: Letting the Paddle Blade Wing Out
The Problem: During the power phase, the blade angles toward the kayak’s side, pushing water sideways instead of backward.
The Fix: Throughout the power phase, keep the paddle shaft roughly perpendicular to your direction of travel. Your lower hand acts as a control point — if you notice the blade winging out, your lower hand is likely rotating.
Imagine the paddle shaft is a rail, and your lower hand is locked to that rail. The shaft doesn’t rotate; only the angle relative to the water changes.
Mistake #5: Skipping the Recovery Phase
The Problem: Rushing through the recovery to get to the next catch. This produces a choppy, inefficient stroke cycle and fatigues you faster.
The Fix: Treat the recovery as an active, intentional phase. After your blade exits, take a full breath as you reset. Let your torso rotate back to center. Position your blade for a clean setup.
Rushing the recovery doesn’t make you faster overall. It makes each individual stroke slightly more efficient to complete the next one, but the cumulative effect is slower and more tiring paddling.
Practice Drills to Transform Your Forward Stroke
Theory is useful. practice is essential. Here’s how to build the muscle memory for an efficient forward stroke through structured drills. For additional practice ideas, explore our collection of kayaking drills for beginners to improve your skills.
Drill 1: Pause-and-Catch (Isolating the Power Phase)
Purpose: Isolate torso rotation and core engagement by removing the speed component.
Instructions:
- Paddle forward at an easy pace for 5–10 strokes to warm up.
- On your next stroke, stop at the catch position (blade in the water near your toes).
- Pause for 2–3 seconds. Feel your body position, core engagement, and blade angle.
- Execute the power phase slowly, focusing on torso rotation driving the stroke.
- Complete the exit and recovery normally.
- Repeat 8–10 times per side.
What to Focus On: The pause lets you assess whether your blade entry is correct before committing to the power phase. Use this moment to check your torso rotation and core engagement.
Drill 2: One-Cycle Stroke (Full Body Awareness)
Purpose: Slow down the entire stroke cycle to build awareness of each phase.
Instructions:
- Take one stroke, but make it last 10 seconds — 2 seconds per phase.
- Move slowly through setup, catch, power phase, exit, and recovery.
- Notice where the stroke feels smooth and where it feels awkward.
- Take 5 normal strokes, then repeat the slow cycle.
- Do 5–8 slow cycles per side.
What to Focus On: This drill reveals compensating habits. If the slow stroke feels very different from your normal stroke, those are the habits you’re normally relying on — and may need correcting.
Drill 3: Paddling with Eyes Closed (Body Position Feedback)
Purpose: Build body awareness by removing visual feedback and relying on kinesthetic (body position) feedback.
Instructions:
- Find a straight, calm stretch of water.
- Close your eyes and paddle forward slowly.
- Pay attention to how the kayak tracks — does it feel straight or does it pull to one side?
- If you drift, note which side it pulls toward. This tells you which side’s stroke needs work.
- Open your eyes and continue paddling. Then close again and try to match the straight-tracking position.
- Practice in 30-second intervals with breaks.
What to Focus On: Most paddlers who drift to one side have a weaker stroke on the opposite side. If you’re drifting, your “strong side” is overcompensating and your “weak side” is underdeveloped. Pay extra attention to the weaker side’s technique.
Drill 4: Short Bursts, Long Pauses (Building Power Through Connection)
Purpose: Build explosive power by training your core to engage quickly at the catch.
Instructions:
- Paddle at an easy baseline pace.
- Every 8–10 strokes, take 3 explosive strokes — fast, powerful strokes focusing on core rotation.
- Pause for 10 seconds, paddle normally for 20 seconds, then repeat.
- Do 6–8 sets of explosive bursts.
What to Focus On: The pause after the burst teaches your body to recover between power phases. The burst itself trains quick, powerful core engagement at the catch — a crucial skill for surfing waves, navigating currents, or sprinting.
Drill 5: The Towline Test (Measuring Efficiency Gains)
Purpose: Objectively measure your forward stroke efficiency by testing how well you can move in a straight line.
Instructions:
- Attach a light towline (or a piece of rope with a small float at the end) to your kayak.
- Paddle forward at a moderate, sustainable pace.
- Have a partner hold the other end of the towline and observe how much tension they need to maintain to keep the line taut.
- Better paddling technique = less tension needed = straighter tracking.
- Alternatively, paddle in a circle while keeping the line taut — tighter circles mean less efficient strokes.
What to Focus On: This drill provides objective feedback that’s hard to ignore. If you see improvement in your tracking over practice sessions, your technique work is paying off.
Gear That Supports a Better Forward Stroke
Your paddle is your primary tool for executing an efficient forward stroke. The right paddle can support good technique; the wrong one can make even perfect form feel awkward. For a comprehensive look at choosing paddles, see our complete guide to kayak paddles.
Paddle Length and Blade Shape for Forward Stroking
Paddle length depends on your height, your kayak’s width, and your preferred paddling style. As a general starting point:
- Paddlers under 5’6” typically need paddles 210–220 cm long.
- Paddlers 5’6” to 6’0” typically need paddles 220–230 cm long.
- Paddlers over 6’0” typically need paddles 230–240 cm long.
Wider kayaks require longer paddles to avoid scraping the deck on the opposite side.
Blade shape affects how your paddle interacts with the water:
- Large, symmetrical blades: Maximum power per stroke, but higher fatigue over time. Common in whitewater.
- Small-to-medium, asymmetrical blades: Balanced power and efficiency. Preferred for touring and recreational paddling.
- Spooned blades: Curved to catch water more efficiently, reducing flutter (wobbling) during the power phase.
For most recreational and touring paddlers working on forward stroke efficiency, a medium-sized asymmetrical or mildly spooned blade is the best starting point.
Recommended Paddles (2026)
In our testing across multiple years and conditions, these paddles have consistently supported good forward stroke technique:
Looking at these options, here’s our take based on paddling thousands of miles with different gear:
- Best Overall Forward Stroke Paddle: The Werner Shuna. Its balanced blade shape and moderate swing weight make it an excellent tool for working on technique. The medium-sized blade lets you feel the water without overwhelming smaller paddlers.
- Best Lightweight Option: The Aqua-Bound Manta Ray Carbon. The carbon shaft reduces fatigue on longer paddles, and the medium blade works well for broader touring applications.
- Best Value: The Carlisle Centerblade. At a budget-friendly price point, it still delivers the centered blade design that promotes consistent hand positioning.
When to Upgrade Your Gear
You don’t need expensive gear to develop good technique. But you might be ready for an upgrade if:
- Wrist or forearm fatigue: Your blade may be too large for sustained paddling. Try a medium-sized blade instead.
- Shoulder strain on the catch: Your paddle may be too long, making proper body position difficult to maintain.
- Hitting a performance plateau: If your technique is solid but you want to go faster with less effort, a performance paddle with a carbon shaft and efficient blade shape will help.
Advanced Techniques: Taking Your Forward Stroke to the Next Level
Once your forward stroke feels natural, you can explore variations that serve different paddling situations. Building on your forward stroke foundation opens up opportunities to learn more advanced techniques like the kayak roll.
High-Angle vs. Low-Angle Forward Stroke Techniques
Two main paddling angles dominate the sport:
Low-angle paddling (blade enters at roughly 45 degrees to the water) is the standard for touring and recreational paddling. It allows for a higher cadence with less upper-body strain, making it ideal for covering distance efficiently.
High-angle paddling (blade enters near-vertically close to the kayak) is common in whitewater, surf, and situations requiring rapid acceleration. It produces more power per stroke but at a higher physiological cost.
Most recreational paddlers should focus on low-angle technique. It’s more sustainable for long-distance paddling and forms the foundation for touring and fitness paddling. If you’re interested in exploring different paddling environments, our comparison of sea kayaking vs lake kayaking covers how technique adapts to different water bodies.
Integrating the Draw Stroke for Course Correction
No matter how good your forward stroke is, you’ll need to correct course occasionally. Rather than stopping to execute a dedicated turn, learn to integrate small draw strokes into your normal paddling rhythm.
A quick draw stroke — reaching out to the side and pulling water toward your kayak — can straighten your heading without slowing down or breaking your rhythm. This integration technique is especially useful in currents or wind where constant small corrections are needed.
Building Endurance: Stroke Rhythm and Cadence
Efficient long-distance paddling comes from sustainable rhythm, not constant effort. Think about the pace you can maintain comfortably for 2–3 hours, then dial in your cadence to that sustainable rhythm.
If you find yourself fatigue-paddling (short, choppy strokes when you’re tired), that’s your signal to back off the effort. Fatigue-paddling is less efficient than sustainable paddling, and it trains bad habits.
Final Thoughts: Patience, Practice, and the Water
The forward stroke isn’t a technique you master in a single afternoon. It’s a skill you refine over months and years of paddling. And that’s perfectly fine. The process of improving is part of the joy of kayaking.
Focus on consistent practice over perfect technique. Fifteen minutes of deliberate focus during each paddling session will yield better results than one marathon practice session every few weeks.
Don’t chase perfection. Chase progress. Each session where you notice a small improvement — smoother rotation, cleaner catch, straighter tracking — is a successful session.
The water will be there. Your paddle will be there. And you’ll be ready to make your next stroke count.
Ready to keep learning? Explore related guides:
- Kayak paddle technique for beginners
- Proper kayak stroke form fundamentals
- Common forward stroke mistakes and how to avoid them
- Practice drills for kayakers to improve your skills